Tabular
File
The Tabular file
screen enbles the
creation of a layer based on a
tabular file, such as a .csv or a .dbf file. Once a file has been
opened it is possible to preview it's data in order to configure it,
thus enabling the user to configure the data to it's
appropriate
type or even configuring a new geometry.
It
can be accessed through
the following menu:
Project
> Add Layer
> Tabular File...
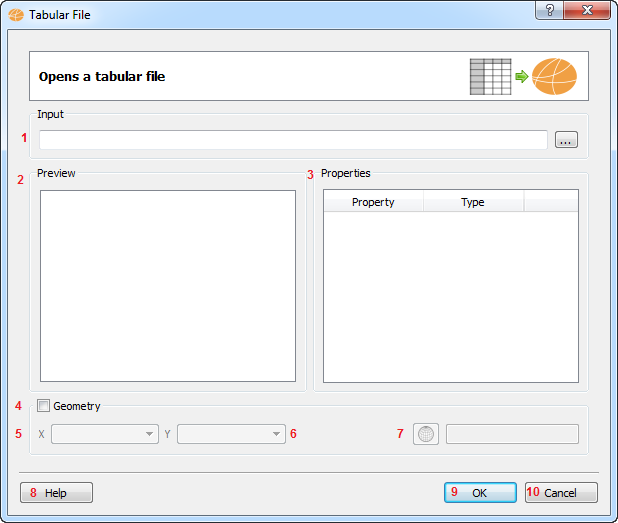
Once the menu
item has
been clicked, the following screen
will be shown:
Interface
description:
1 - Input data -
This component is used to open up the file that will be used
to
generate the new layer.
2 - Preview table - Displays
a few rows of the data
contained in the file. Used in order to make it easier to configure
the data types.
3- Properties table - Used to
configure the data types.
4 - Geometry check box - Used to
decide weather or not to create a new geometry.
5 - X spin box - displays all the
data available that can be used to generate the X axis of a new point.
6 - X spin box -
displays all the data available that can be used to generate the X axis
of a new point.
8 - Help button - Opens the
help window.
9 - Ok button - Creates
the layer based on the file
provided and the chosen configuration.
10 - Cancel button - Closes
the dialog without generating a new layer.
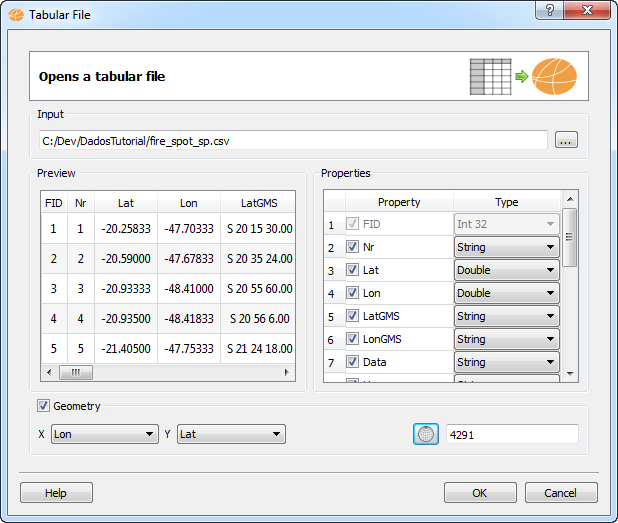
Once
the file has been
selected the screen's components will display
the information contained by the file, for example:
Each
of the combo boxes
listed beside a property name holds a list of
possible data types. One common usage for this is to change the types
so that a point can be created based. In this case the properties Lat
and Lon and string, but as seen on the data preview table they can be
converted to double, once that is done, a point can be created based on
them. It is also possible to select weather or not to import any of the
properties, save for the primary key or a geometry, if there is one.
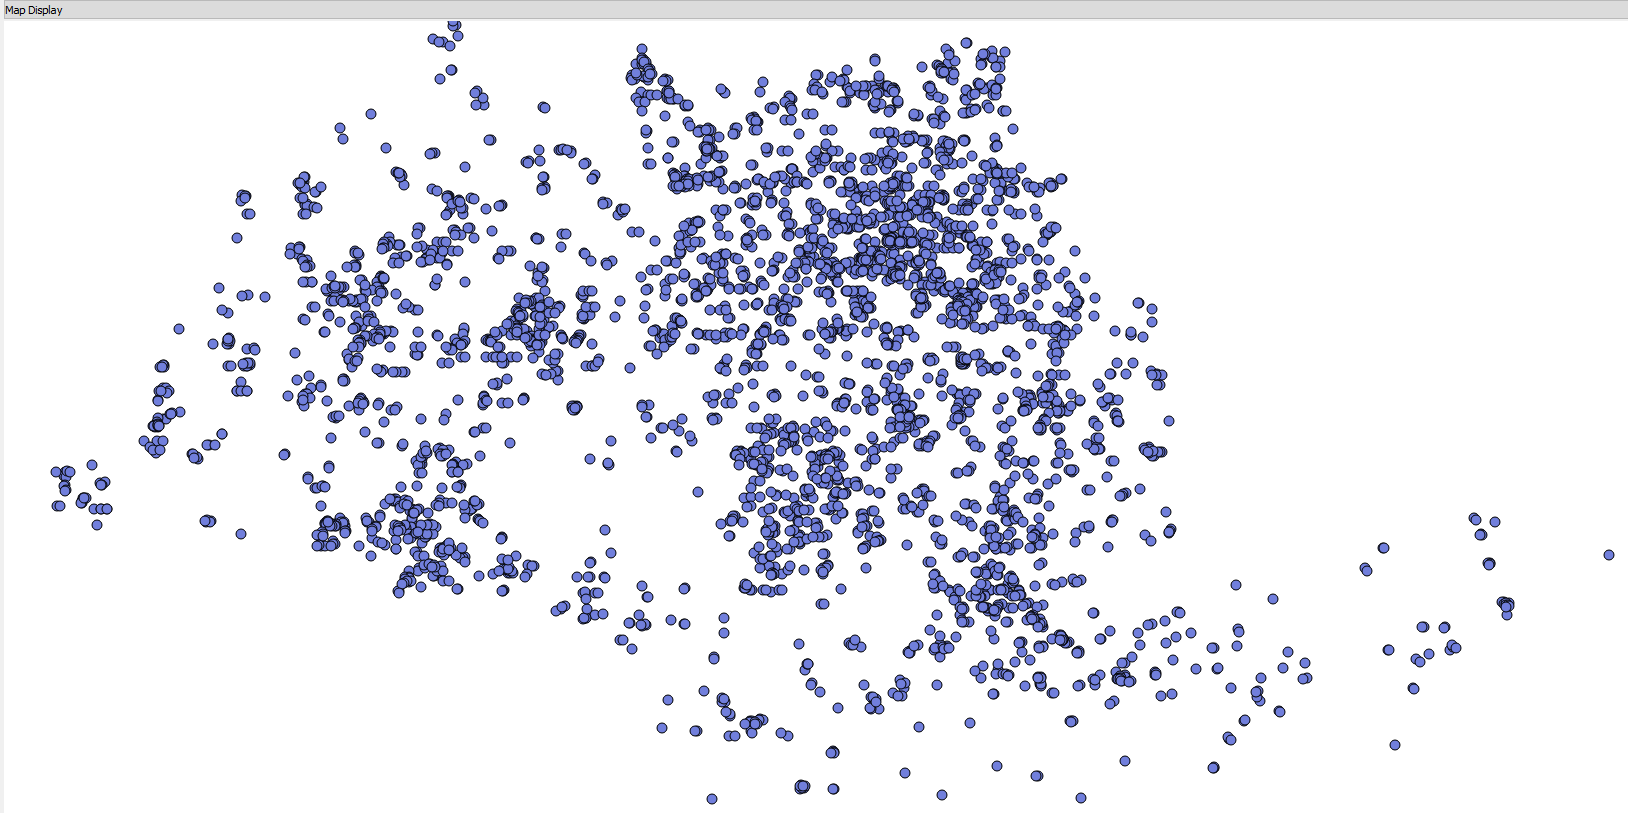
The
resulting layer works in
the same way as the other layers, and
it's configured geometry appears as shown on the following screen:
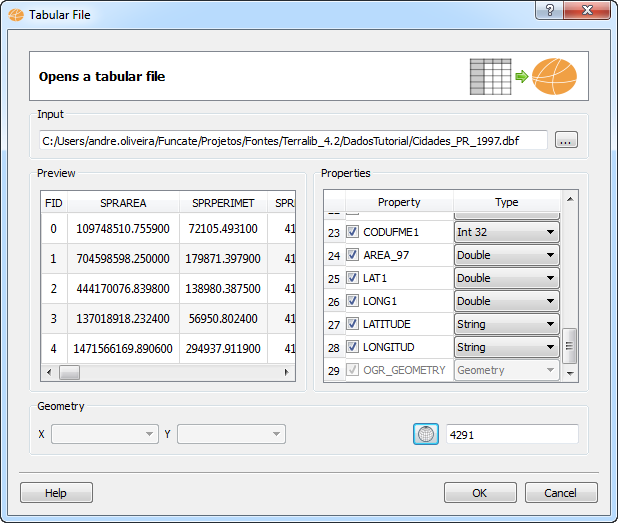
In cases
where the file
may already have a geometry the geometry
section will allow only the SRID to be edited. It will appear as
folllows: